Back up camera?

Chevy Spark EV Forum

Help Support Chevy Spark EV Forum:

This site may earn a commission from merchant affiliate links, including eBay, Amazon, and others.
2)
I connect my Ipods directly to the usb port, using a usb to 30 pin cable. Then in the multimedia menu I have a new option "IPOD".
 
sTeeve said:
So, yeah, updating firmware from 15.41-95281509 to 24.5-42341011 doesn't brick the head unit.

I followed these instructions: https://sourceforge.net/p/mylink-unlock-project/wiki/Home/

Not difficult.

But it's a loser. We lose the energy screens; we lose the onscreen climate settings menu, and we lose some of the climate control indicators at the top of the screen (and those that remain are stuck...i.e., they don't change with the manual control changes...).

Everything else works. Steering control functions. No video-in-motion but that's cause I don't have a rear-view camera, yet.

BringGo USA/Can gets joined by BringGo Russia :D.

And we get MirrorLink. Yay?

Been simultaneously working on the backup camera pavados method while stumbling upon this... Took a gamble after I saw a Spark EV 2014 owner tried the 24.5 firmware with moderate success, only mine's the 2016 model... Do not do it on a 2016 folks. It worked, I have MirrorLink in the app screen now, but not only does that not illuminate when my S7 is connected, Android Auto enabled with the USB cable plugged in, etc, but the MyLink screen in general is extremely sluggish now, responds to touches 2 out of every 10 seconds, steering wheel buttons broken even after the fix applied... AND, the icing on the cake, the MyLink screen doesn't turn off when the 2nd blue wire on the aux connector is cut, effectively making the pavados method worthless on this firmware. I contacted my dealer after failing to find the 16.4 firmware online anywhere (had previously looked before taking the gamble knowing I probably wouldn't be able to downgrade myself) and am going to have to shell out $140 to have them flash the stock firmware for me again. I asked and they will not provide it to me on a flash for those here which I had been hoping for.
 
Had the dealer roll me back to 16.4, steering wheel buttons and everything now working except the backup camera. When the second blue wire is cut, the radio (MyLink screen specifically..) stays on/responsive. Same with 1st blue and purple wire, don't seem to affect the MyLink.

Suggestions anyone?

2016 EV
 
ee241 said:
Suggestions anyone?
Garmin nuvi with the optional backup camera?


It's nice to have a dedicated NAV system in an EV for those times when you are pushing it to the next DCFC.
If the GOM and the Dist to Dest are too close together, I slow down or turn heat down and the numbers separate!
Lifetime map updates, live traffic (in some areas). Take it on vacations for the rental car.

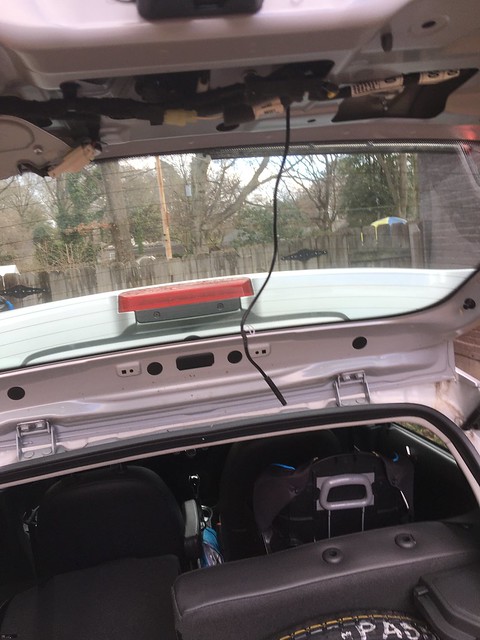
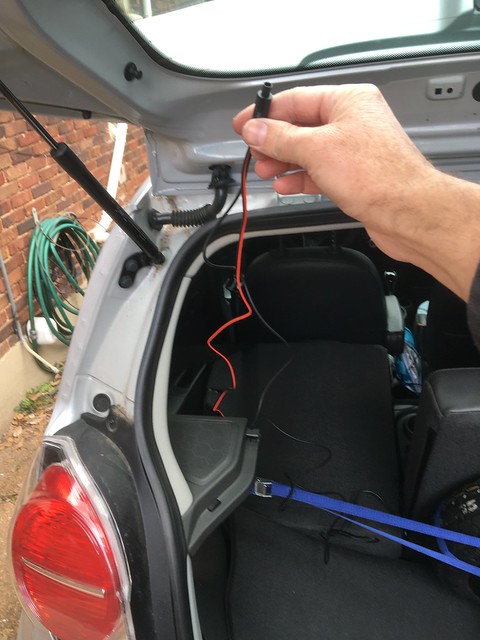
The camera displays quick when tested on the bench. I have not snaked the wires thru the hatch flexi-tube to the back up lights yet , so......

It will probably end up on my Element that the GF drives. She needs it more than me.... :roll:
 
I know I'm a little late to the party, but I wanted to thank everyone on the forum. I just completed installing a camera using the Padavos method. Works great.
 
GladstoneCoach said:
I installed a back-up camera using the padavos method this past weekend. Everything looks pretty good, back-up camera in reverse, radio in all other shifter positions. I have a couple questions for others who have installed a back-up camera using this technique:

1) the fidelity of the image doesn't seem to match what I've seen in other pics on this board. The camera seemed to be pretty sharp when I plugged it into a monitor to test prior to installing, but looks really grainy in the vehicle. Anyone else notice this or have some suggestions to address this?

2) This is the big one - even with the relay installed to set the circuit back to "normal" when the camera is not powered, there is no ability to play audio through the aux input (except in reverse). I did the wife's car first and this has become an issue when she trys to play tunes through her phone or iPod. The aux input functions fine in reverse - it plays even with the back-up video. The bad news is that she doesn't spend nearly as much time in reverse as she does driving! I don't think asking her to go into "stunt mode" and commute in reverse is a viable solution.

Any thoughts other than disconnecting the camera? (I've got her using bluetooth for the phone, but no bluetooth on her old iPod - which is what she uses more frequently)

Thanks!

I wired my backup camera to the user "padavos" on page 13, (thank you very much) and I noticed that my camera worked without connecting "video-" to the purple wire. I checked the resistance of the purple wire and it is not 0 ohms to ground or "ground" and so I did not connect it. Maybe this has something to do with the audio issue? Also possibly blue wire may not connected to the normally closed contact?

Also using a little lubricant to slip the wires through the boot at the rear hatch worked great for me.

Also, the hardest part of running wires (if you have more than just the reverse camera wire) to the front of the car is removing the side rear airbags. Look them up on ebay (for pictures) and you can see where the loop is that "pops" in place. It takes ALOT of force to pop them up, but once you have it out of the way running the wires is pretty easy. Warning: Disconnect battery for 2-3 minutes before messing with any of the airbags just to be safe.

I also found a camera that is a direct replacement with the correct bulb opening. https://www.ebay.com/itm/332424133532 It is a Special unbranded rear view camera fit for CHEVROLET EPICA/LOVA/AVEO/CAPTIVA/CRUZE/LACETTI/HRV/Spark and has these specifications: Effective Pixels: PAL:728(H) * 582(V) NTSC: 720(H) * 492(V), Lens: 13.5mm, 99mm x 29mm overall dims, screw centers are 77mm center to center and it has a 15mm hole for bulb. You will have to look through a bunch of them on ebay to find the correct one with these dimensions. Also the more lines the better but 700-800 lines is about all video is is good for but don't use a 400 line camera as it will be lower resolution. (The 500+ line looks pretty good.)

Johnny
 
Sorry newbie here....but if I use the padavos method...The Video wires have a RCA type input....do I cut the wires at RCA Input connectors to tie them into the First Blue wire with Video + and then other one into purple for Video - ?

Using these Backup Kit wires https://www.ebay.com/itm/332424133532 with the yellow RCA connectors.
 
gilrebel said:
Sorry newbie here....but if I use the padavos method...The Video wires have a RCA type input....do I cut the wires at RCA Input connectors to tie them into the First Blue wire with Video + and then other one into purple for Video - ?

Using these Backup Kit wires https://www.ebay.com/itm/332424133532 with the yellow RCA connectors.

If you cut off the plug before the split to the yellow and red connector, there is a shield (bare strands), yellow (video+ connects to the first blue wire) and Red (12v positive) to power the relay to open the second blue wire. 12v positive power is supplied from the back up light at the rear of the vehicle.

Shield is ground for video and 12v negative (car frame ground) are common tied together. The reason you don't need the video ground is because it is already common with the 12v (negative) ground in the camera. Hope this helps.
(See re-post of the instructions below)
johnny

padavos said:
i was able to add a camera to my 2016 spark ev without programming,
it takes some effort but you will have a nice back up camera for $20

1.buy an inexpensive $15-20 back up camera and have it power up from the back up lights.
2.guide the video wire together with an additional +12 from the reverse lights to the front.
3.detach the small plastic panel holding the usb and aux female plugs.
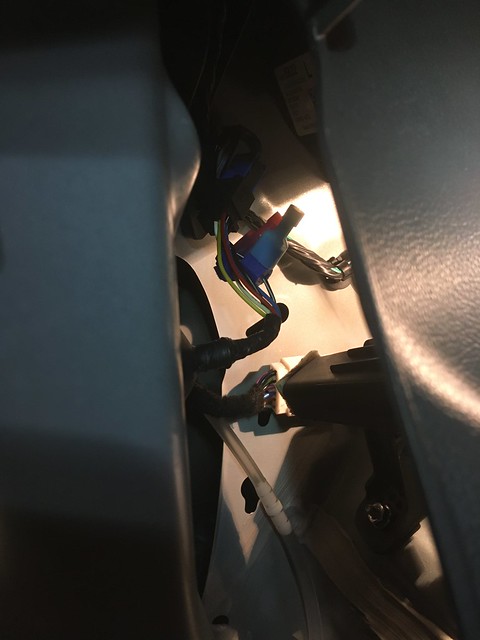
4.detach the 6 wire connector on the back of the aux plug
5. the 6wires on the aux connector are in this order blue, blue, black/white, purple, green, grey
6.connect video+ to the first blue wire
7.connect video- to the purple wire (NOT REQUIRED, VIDEO- IS ALREADY CONNECTED TO CAMERA SUPPLY GROUND, JOHNNY )
8.cut the second blue wire.

at this point the camera will come on the screen as long as there is video feed and in our case the car is in reverse,
however the radio and everything else will be dead because of the cut second blue wire.
to make the radio work again the cut blue wire must be connected back together,
to do that we will use a standard 12 volt automotive relay

9. use a 12 volt relay like an automotive one with 5 pins,
10. connect the +12 lead you just brought from the rear from the reverse light to the coil of the relay or contact no 85 on a standard automotive relay.
11. connect the other side of the relay (contact 86) to the common of the relay switch (no 30) and also to the cut blue wire that is still attached to the wire connector (that will be 3 wires together)
12 connect relay switch contact no 87a which is normally closed to the cut blue wire coming from inside the vehicle harness.

that is it, when you go in reverse the relay will energize and open the 30 to 87a which a normally closed switch
the radio will go off while in reverse
when you shifty back to forward the relay will de-energize and let the switch close again, effectively connecting the 2 blue wires back again
and the radio will come back, it tool me a whole day to figure it out, but you can do it an an hour or two. enjoy

ps i dont see way to add a diagram here, email me if you want it [email protected]
 
Hello everyone, I know this is an old thread but I can confirm this work fine with a Spark EV 2016.


Thanks Mr. E.Poi for your all you efforts in doing this write-up!
 
Hi Has anyone tried this camera?. I really want to get one but I am scared it might be bad quality or might not even work at all.

https://www.ebay.com/itm/Waterproof-170-HD-Car-Rear-View-Backup-Reverse-Parking-Camera-Night-Vision-Black/253579171558?fits=Model%3ACruze%7CMake%3AChevrolet&epid=19018434794&hash=item3b0a7f16e6:g:1aUAAOSwoKFa3c6X

looks oem to me.
 
I get a bit nervous when ordering something that ships directly from China. Notice if you buy it you have to pay for return shipping if it does not work. If it works great, if not you may be out $13.

Page 14 has a link to this model that looks like it is OEM.
http://www.aliexpress.com/item/hot-...A-AVEO-CRUZE-CAPTIVA-BUICK-GL8/553378821.html

The challenge is getting the camera to show up on your cars screen. You may read this whole thread if you have time it has good info on 2 different approaches to get this to work.
 
I ended up installing a backup camera on my car. I ran into some issues so I wanted to share my experience for anyone else interested in doing this.

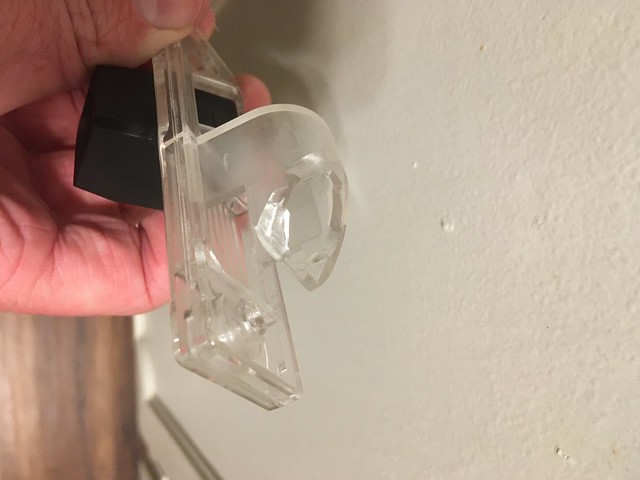
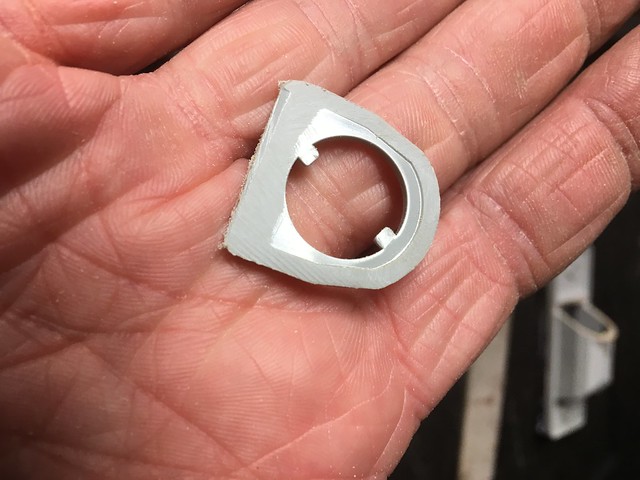
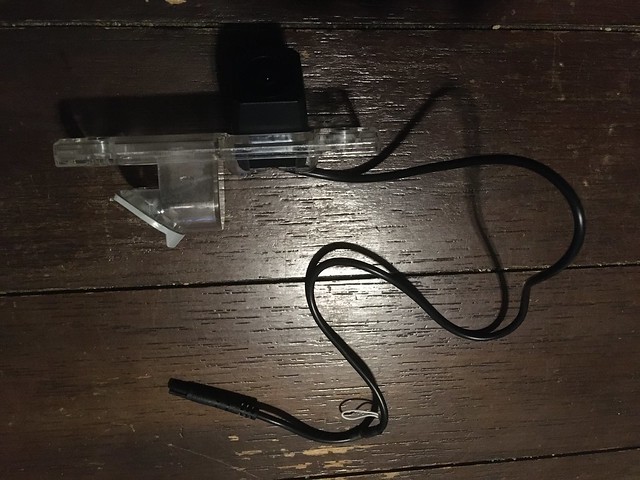
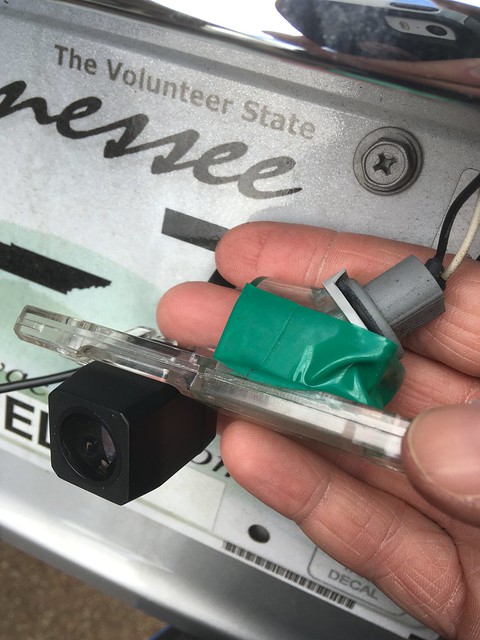
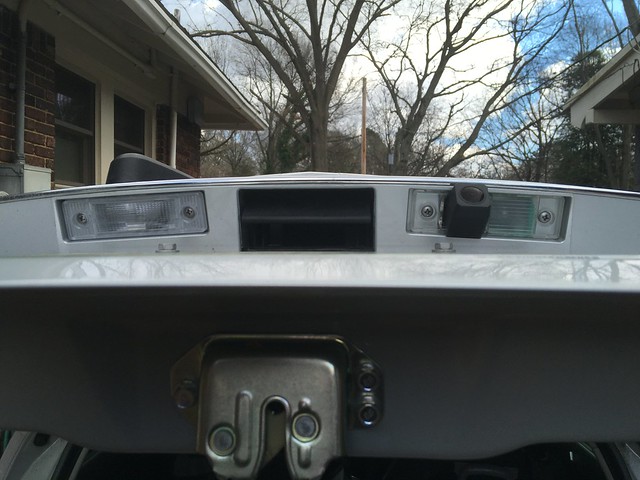
I ordered this camera https://www.amazon.com/gp/product/B07Q28TH55/ref=ppx_yo_dt_b_asin_title_o03_s01?ie=UTF8&psc=1. I ordered since it showed that it had a sealed light bulb and I could always cut the OEM one and superglue it on like someone else showed. BUT when I received it the housing was open. I ended up continuing to install it and I wrapped the base with electrical tape to make it weather resistant. I did have to hacksaw the old housing, file it down and super glue it to the new housing so the bulb fit correctly.

49492685616_7f79eb775f_z.jpg

Unaltered product.

49492183813_c2a16d82ce_z.jpg

Existing part of license plate lamp cut off and sanded to accept superglue and hopefully provide a water resistant enclosure.

49492184598_3a53acb1f4_z.jpg

Product with original bulb socket super glued on.

49492187413_0b5e727211_z.jpg

Camera/lamp assembly modified and opening sealed with electrical tape. I rolled the tape down flat on the edges so when it is installed the screws sandwich the tape between the body and the housing so it is not strictly relying on the adhesive.

You must remove one screw (where you pull the door shut on the inside) and gently pull to remove the inner hatch panel. When you remove the license plate lamp (passenger side one) there is a grommet just behind it where you can snake the wire inside around the edge without having to remove the exterior trim or wiper arm.

The next issue I ran into was that the cable from the camera was too short to be able to reach the flexible rubber wire housing at the top of the hatch where the existing wires run. If it reached it would have been perfect and probably fit through that grommet.

49492223293_5c91590b3d_z.jpg

This wire is very small and would be great for snaking if it was longer, but unfortunately it is not.

49492934082_1d67bb2467_z.jpg

This is the female end of the wire harness above but it is about 3 times the diameter.

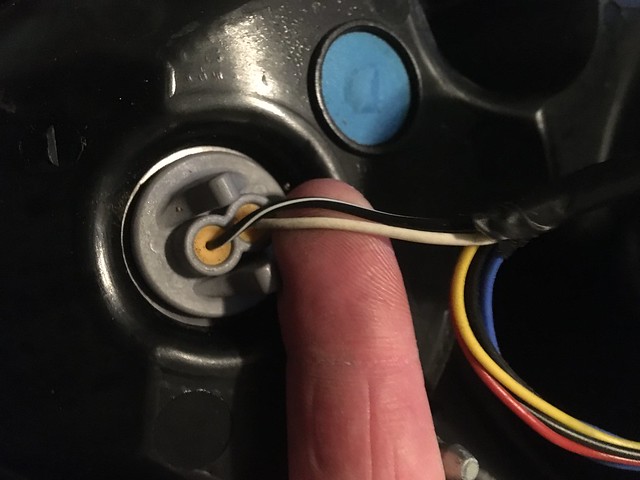
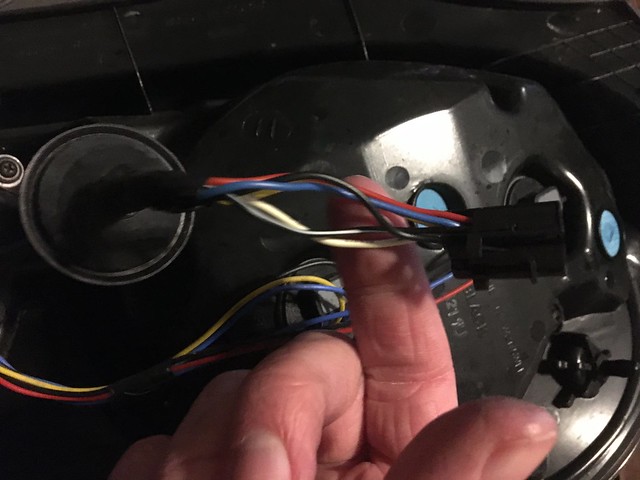
Since it did not fit I ran some wires from where the cable could reach down to the tail light to tap into the power of the reverse light. I tapped in behind the side panel on the driver side of the car [the one with the cargo area light] (black wire with a white stripe is the backup light ground and the pure white wire is the positive.) I did remove the taillight to figure out which is the positive and negative but I would not tap into these wires outside of the grommet as the connection and wires would be exposed to the elements. I used T-Tap connectors for a quick and easy connection. The component cable was an RCA end and that will not fit through the rubber wireway so I had to tuck the wires in along the window/ glass gap and run it to the top of the door. Once there I left just enough cable slack for the hatch to open and then started tucking the wires under the rubber liftgate door seal on the car body. Once the wires got below the speaker shelf the wire then ran behind the panel that was removed for tapping into the reverse light power and then ran forward along the edge of the car from there. With that said getting the power lines into the rubber wireway may not be necessary if you just run your power and component cables down to the speaker shelf and have the power lines split off to the power and the component cable continue forward.

49492178208_c12bf573e1_z.jpg

Backup light wires at tail light bulb socket.

49492680066_96e1791b02_z.jpg

Best location to tap into power (between grommet and quick disconnect socket inside the car)

49492180748_c39e874d04_z.jpg

T-Taps installed on factory wiring. (No wires attached yet I was testing polarity at this point)

The back seat plastic edge trim has 1 screw holding it in and the rest of the trim along the door sills and the B Pillar trim just popped off after those were disconnected. The trim at the front had one large round threaded nut you can unscrew with your fingers and one plastic fastener you can just pull out while you are pulling on the trim. From here I ran it through some of the knee space metal so it wouldn't fall down by the pedals or be in the way of the knee airbag.

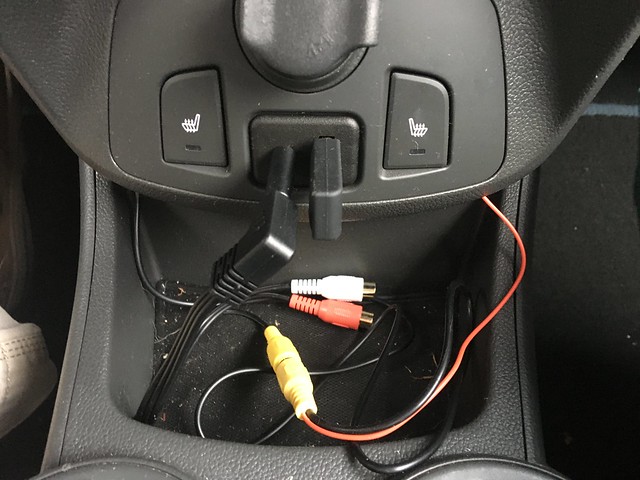
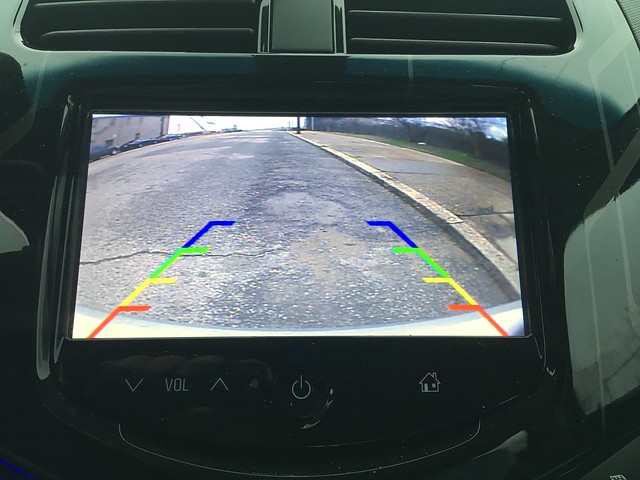
Currently I have the RCA to headphone jack adapter plugged into my Aux-in port unfortunately I got one that has to have an adapter (OMTP-CTIA) and it sticks out more than I like. When shifted to reverse for the first time the backup camera shows up but part of the view is blocked. If you touch the screen the menus go away and the camera is full screen. When you shift out of reverse it changes to Aux-in audio which there isn't any. I just change the input right now. If you shift back to reverse you have to change it back to aux-in video if you need the camera. If you shift quickly through Reverse to drive the camera will not come on. I tried a RCA to USB adapter and it did not work at all. I did order a relay but wanted to test out some of these other options to have an easier option for anyone wanting to do this in a way that may require less cutting into the cars wiring. I may just leave mine in the Aux-in port since it's only 2 taps to change to music.

49492722881_6a56939754_z.jpg

OEM License lamp vs the product I purchased.

49492739891_082dd028b0_z.jpg

RCA to 3.5mm Adapter plugged in (with additional OMTP-CTIA adapter because I ordered the wrong cable.)

49492240388_41b79a77b1_z.jpg

Backup camera view on Mylink screen after tapping the screen to turn off the menus on the top and bottom.
 
Edit: Never mind, it started working. All I did was double check power at the camera before buttoning up the hatch. Maybe it was loose? Anyhow, next question is it normal for the radio to remain in AUX mode after backing up? Having to change back to my music manually is annoying.
----------------------------
I'm trying to wire in a backup camera (the ebay linked one that replaces a license light) using the Padavos method and am having some trouble.

All cables test for continuity from camera to the front and I've triple checked my wiring, even used a different relay. The plug to the camera has 12v backup light and ground. Backup light wire shows 12v at the relay. Nothing happens when the car goes into reverse.

Are the first blue and the purple wire supposed to be tapped into or cut and the video spliced to the harness side? I did the later. Instructions aren't clear but I wouldn't think it makes a difference if you didn't want to use the jack for video.

Any suggestions?

Thanks for the help.
 
I figured out some of my problems. It's working reliably now at least. The instructions have terminals 85 and 86 reversed. 85 should be ground (blue wire) and 86 gets +12v (backup light). Apparently that matters on some relays (mine).
 
Here's the wiring diagram that padavos sent me:
Anyone is welcome to improve the set up, if you find something.

2016_Chevy_Spark_EV_backup_camera_diagram.png
 
Thank you so much Padavos for that detail step by step tutorial.

By any chance, is there pictures or a wire diagram that are available to help me visually??

I just dont want to make any mistake and cause shorts or damage if i made wire mistake.

Thanks for any help with this 😉
 
bezmedia said:
Just 1 question, what is the coil ??

That dotted-line square you see in the diagram indicates that all these components are inside a relay. A relay is a type of switch that works magnetically. The magnetic part involves passing current through a coil to turn the switch on or off. So the coil is inside the relay.

Look up how relays work if you want to know more. I am sure there are plenty of youtube vids.
 
Back
Top